Setting up Reputation Management on your Website Follow the steps provided by the Webware.io Team to set up Reputation Management on your Website Shruthi Gautham
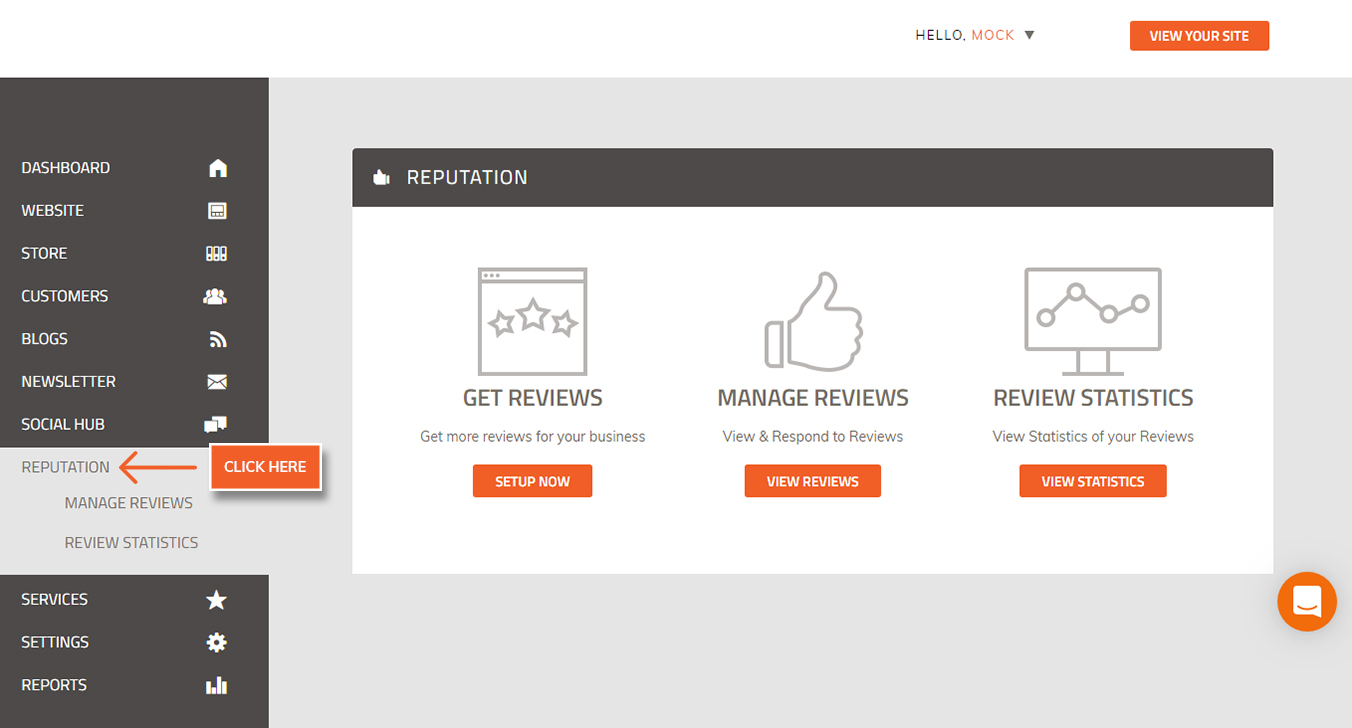
Log into your Website Dashboard. You will see a Reputation tab on the left-hand side of your dashboard. Click on the Reputation Section
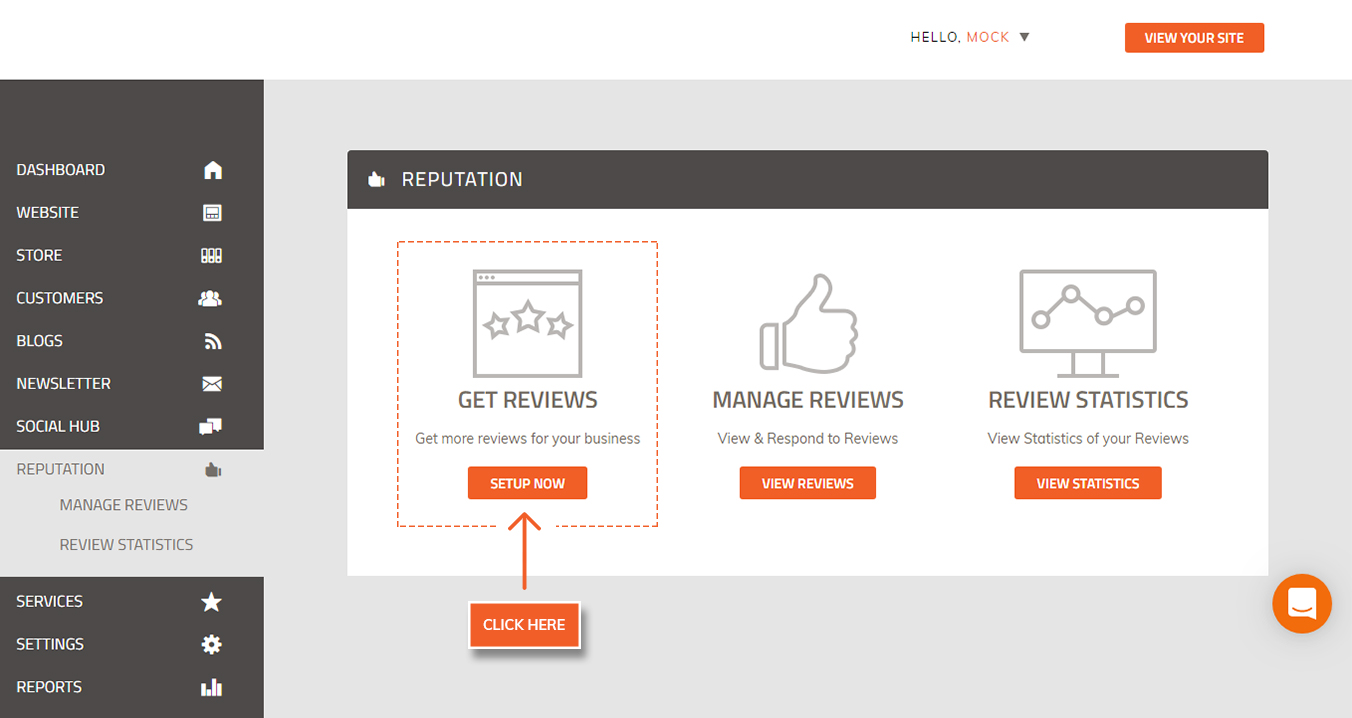
2. To start receiving Reviews from Facebook and Google on your website, you will require to first set up the Reviews feature. Click on "SETUP NOW" under "Get reviews section."
3. Add your Facebook Business Page URL and tick the checkbox for Facebook as seen in the screenshot below.
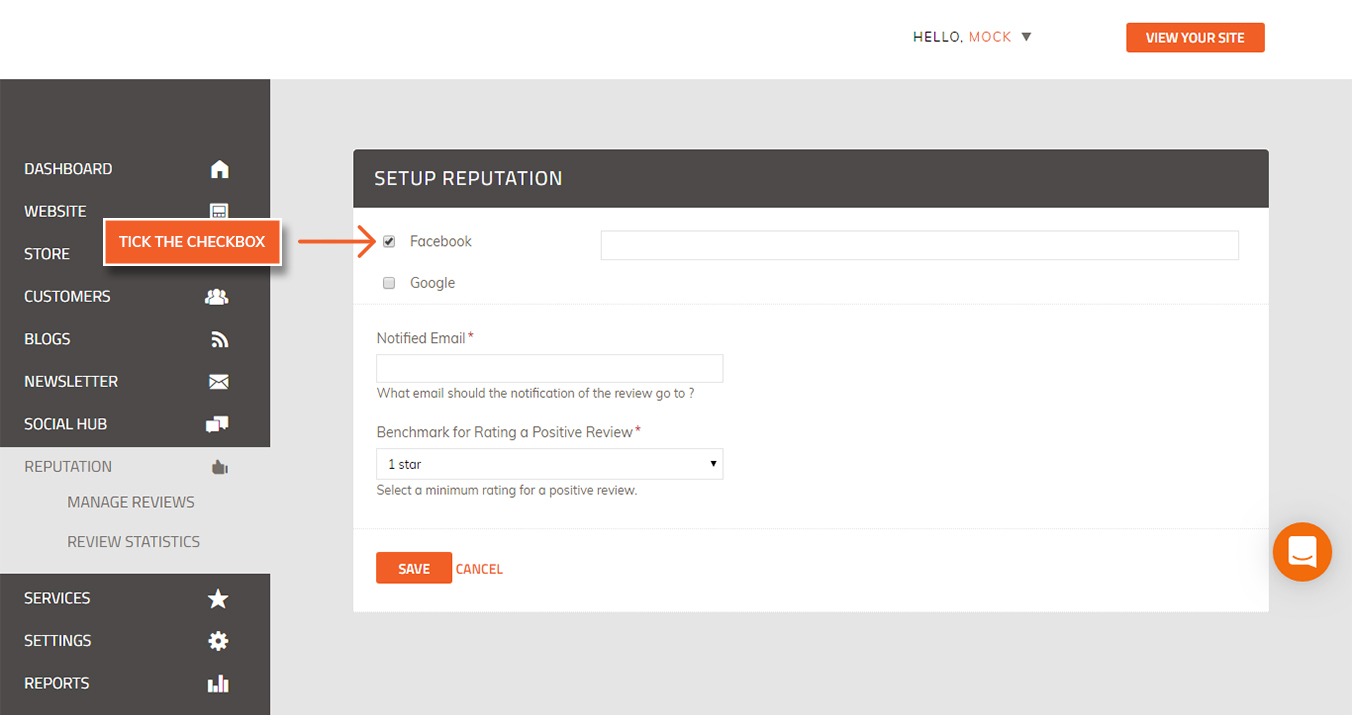
4. Further, select the Google Business Listing URL (This URL should be of the Google Maps).
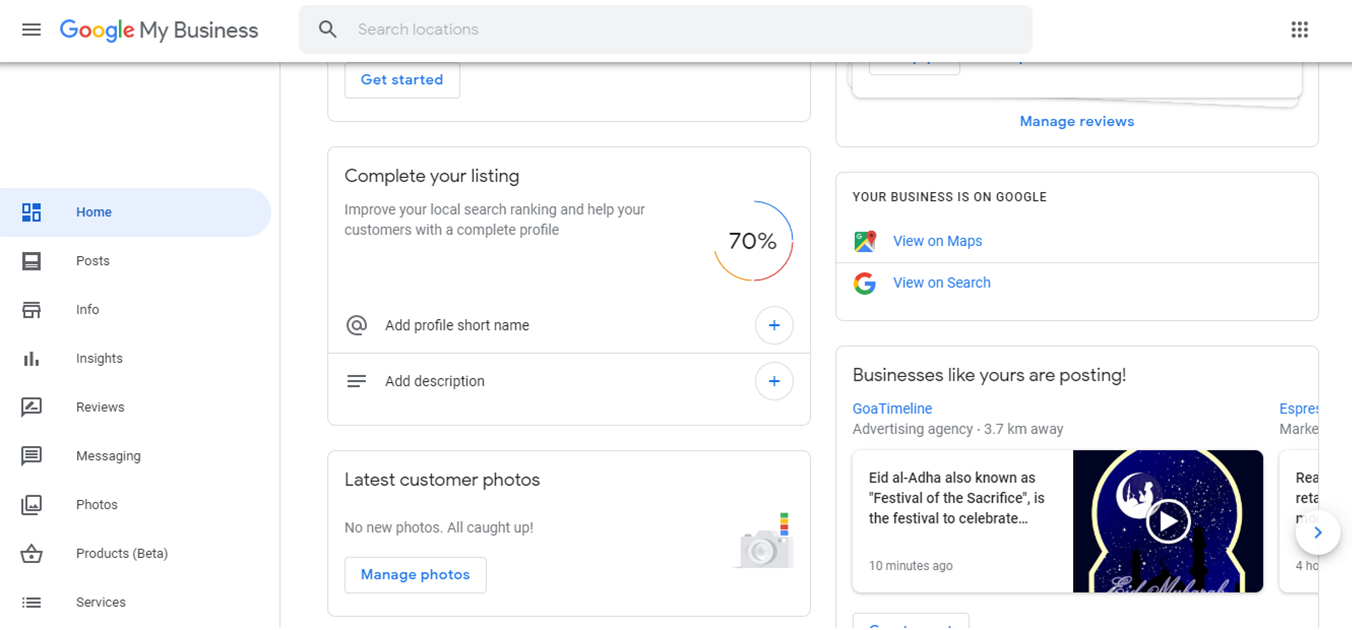
To obtain the Google Maps link, login to your Google My Business account. Open your Listings Home section. Click View on Maps
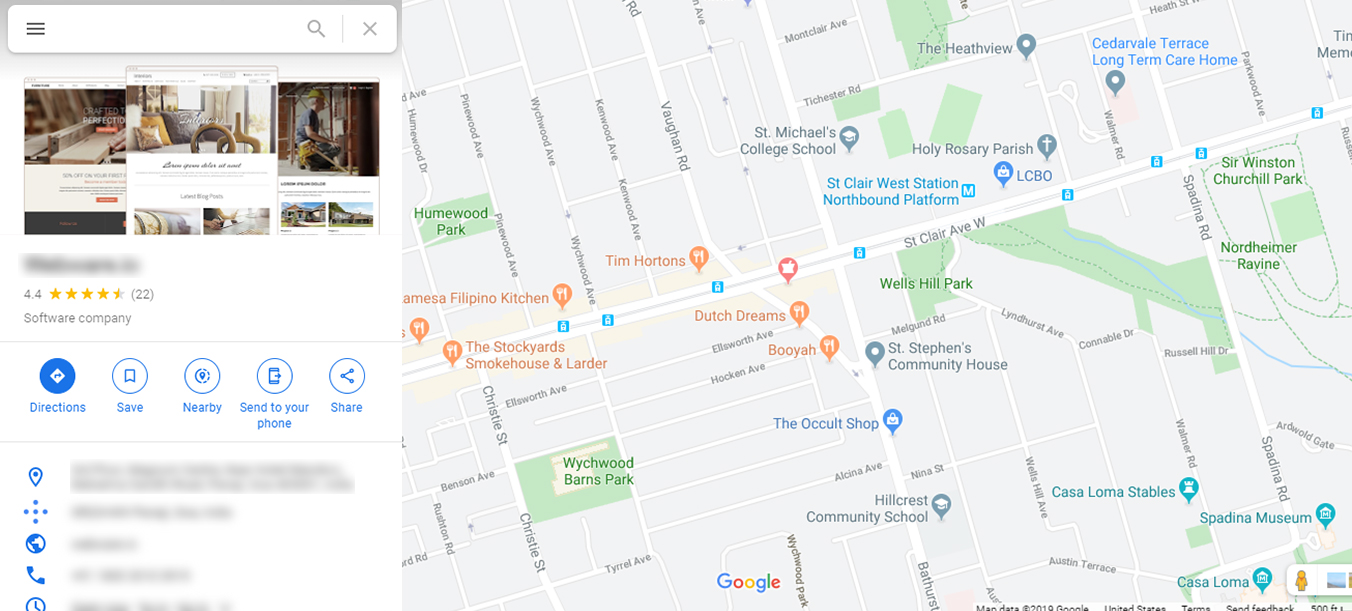
5. On clicking Maps, a MAP will open up like below. Click on the SHARE icon.
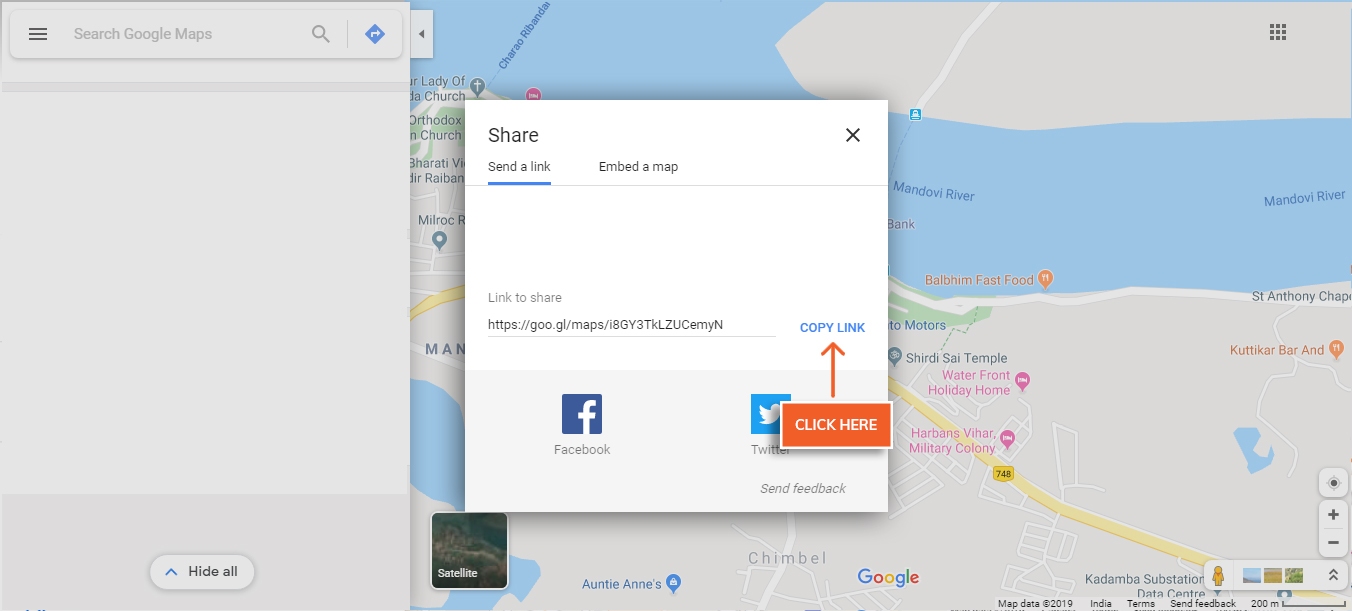
6. A pop-up will open with a shareable link. Click the COPY LINK and copy the URL
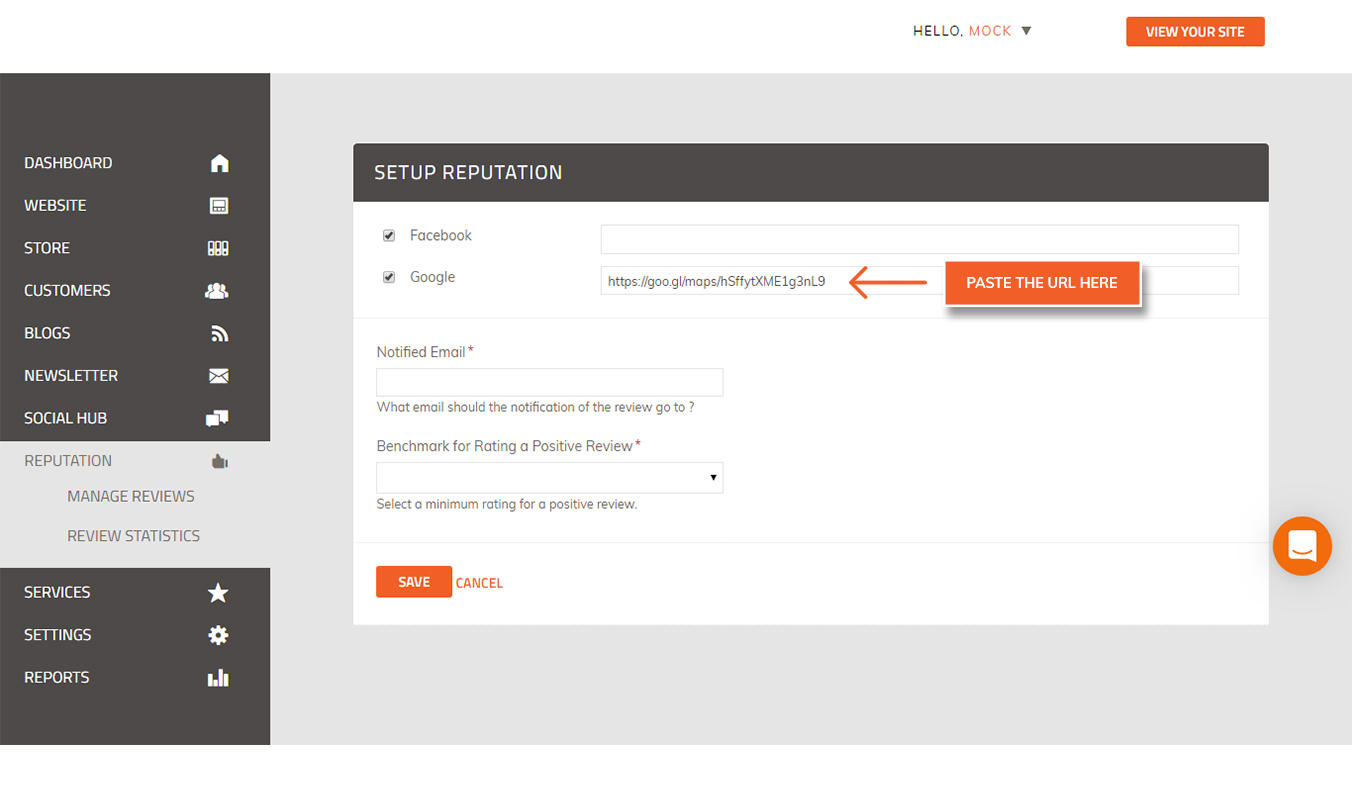
7. Paste the URL in the SETUP REPUTATION section as shown below
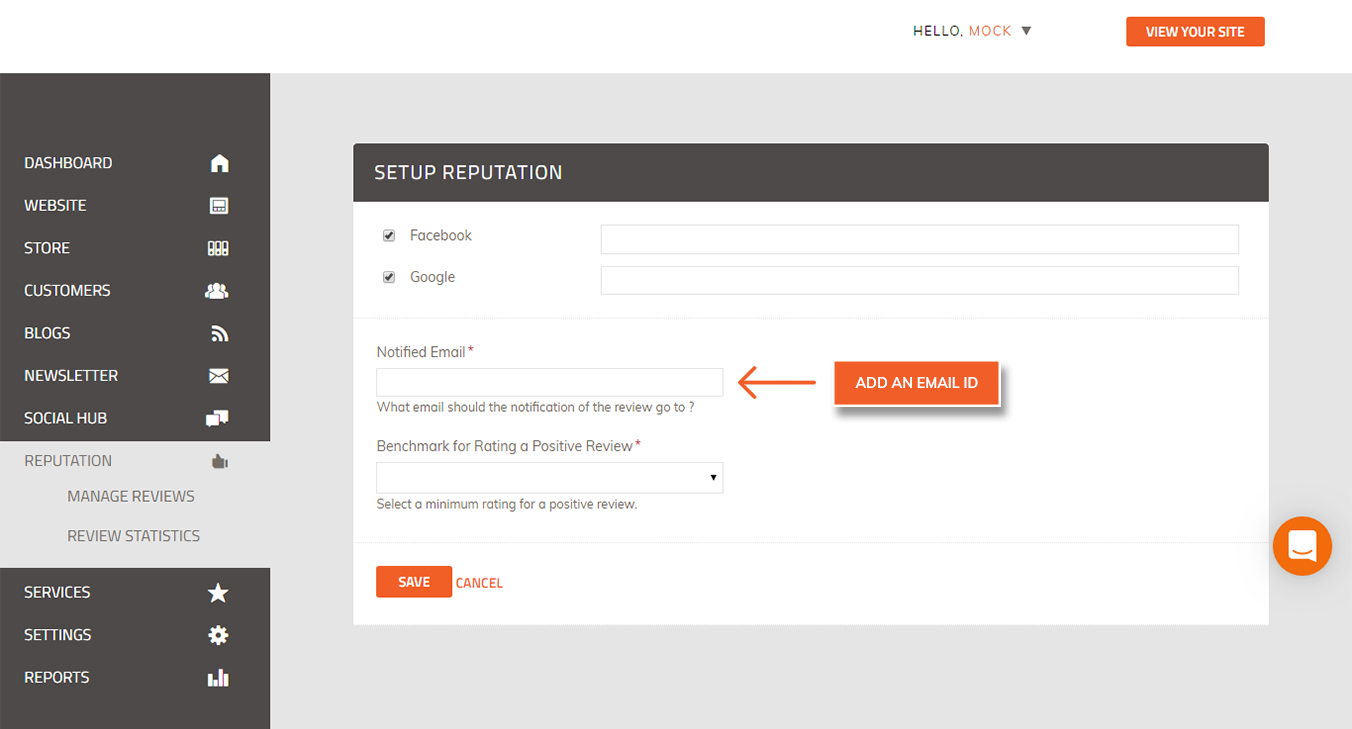
8. Add an email id to which you wish to receive all the notification for your NEW REVIEWS. ( You can also add multiple email ids by simply adding a semicolon (;). You can add up to a maximum of 5 email ids in this field. Do not keep any space.)
9. Select the Benchmark for Positive Reviews as 3 or 4 stars as per your Business needs.
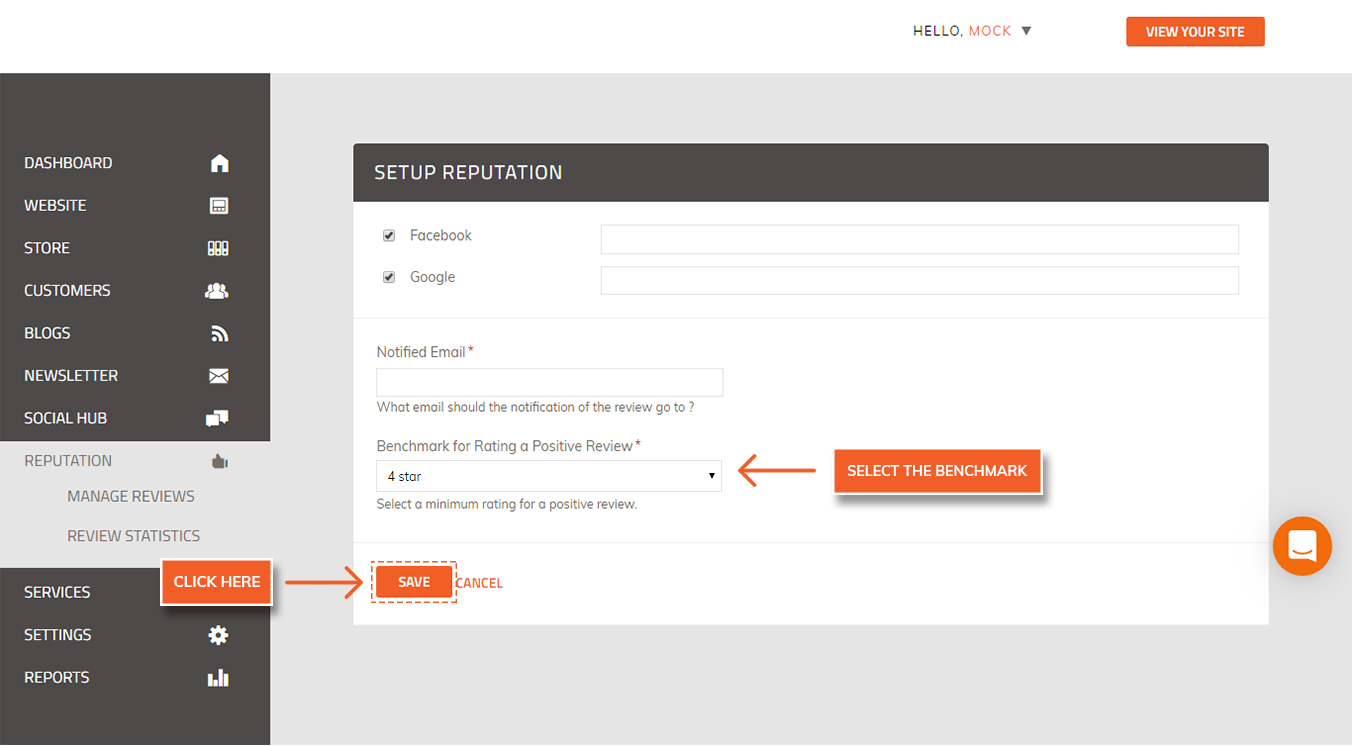
10. Click on Save to save the settings.
Did this answer your question?